How to Roll and Grill Salmon Steaks
By blum099
Ingredients
- salmon steaks
- salk
Details
Adapted from seriouseats.com
Preparation
Step 1
To start, set a salmon steak on your work surface. You're going to need a sharp knife and some butcher's twine, as well. I've found that it sometimes helps to have some bamboo skewers on hand, too, which should be soaked in water for at least 15 minutes before hitting the grill, so you probably want to get those soaking now.
20140724-salmon-steaks-vicky-wasik-3.jpg
Begin by inserting the knife between one of the belly flaps and its inner membrane.
20140724-salmon-steaks-vicky-wasik-4.jpg
Being careful to work along the membrane and not cut into the meat, carefully slide the knife under the membrane, cutting it from the meaty portion as you work toward the tip of the belly flap. Use the knife to trim off any bits of membrane that may be left behind.
20140724-salmon-steaks-vicky-wasik-5.jpg
Next, start working along the membrane in the opposite direction, toward the spine bone in the center of the steak.
20140724-salmon-steaks-vicky-wasik-6.jpg
Working close to the bone to avoid losing any of the meat, cut the meat away from the spine.
20140724-salmon-steaks-vicky-wasik-7.jpg
You may encounter some pin bones that radiate from the spine into the flesh, which will impede the progress of your knife. Carefully pull those bones from the meat: they should slide out with little effort.
20140724-salmon-steaks-vicky-wasik-8.jpg
It's also always good to feel around the meaty portions of the salmon for other pin bones. If you feel one, use fish tweezers to grab the bone and lift it out. If the bone is sticking up, sometimes even fingers will work, but try not to dig into the flesh—tweezers are better for delicately probing beneath the surface.
20140724-salmon-steaks-vicky-wasik-9.jpg
Now work your way over to the other side of the spine bone and cut it free of the meat there, as well. Trim the inner membrane from the other belly flap, just a you did before.
20140724-salmon-steaks-vicky-wasik-10.jpg
The spine should be nearly free now. (I can just see those salmon "legs" dancing with joy!)
20140724-salmon-steaks-vicky-wasik-11.jpg
One small cut is all it will take to completely remove the bone. Some folks also cut out the sliver of darker brown meat just above the spine, going all the way to the skin, but leaving the skin intact. I like that brown meat and leave it in, but it's up to you—feel free to trim it out as well.
Prepare one Belly Flap for Rolling
20140724-salmon-steaks-vicky-wasik-12.jpg
Next, I take my knife and slide it between the skin and meat of one of the two belly flaps, very carefully cutting the skin free, but leaving it attached where the belly flap meets the main section of meat.
20140724-salmon-steaks-vicky-wasik-13.jpg
20140724-salmon-steaks-vicky-wasik-14.jpg
Roll
20140724-salmon-steaks-vicky-wasik-15.jpg
Now the steak is ready for rolling. Fold the belly flap that you just separated from its skin, and bend it up into the space where the spine used to be.
20140724-salmon-steaks-vicky-wasik-16.jpg
Then take the other, skin-on belly flap and curl it under, forming a round shape with the salmon steak.
20140724-salmon-steaks-vicky-wasik-17.jpg
Now, take the flap of skin and wrap it around to close the whole thing into a nice little round package.
20140724-salmon-steaks-vicky-wasik-18.jpg
At this point, the rolled steak isn't secure, so just hold it as best you can while you get the string ready for typing. If it comes undone, just re-wrap it into the same little round shape.
Secure
20140724-salmon-steaks-vicky-wasik-19.jpg
Wind a piece of butcher's twine around the rolled-up salmon steak.
20140724-salmon-steaks-vicky-wasik-20.jpg
Tie it with an overhand knot (as you would when starting to tie your shoelaces); I actually like to wind the overhand knot over itself twice, since this will hold better on its own once you tighten the string.
20140724-salmon-steaks-vicky-wasik-21.jpg
Then pull it tight.
20140724-salmon-steaks-vicky-wasik-22.jpg
And secure the string with a second overhand knot.
20140724-salmon-steaks-vicky-wasik-23.jpg
Trim any excess string.
20140724-salmon-steaks-vicky-wasik-24.jpg
The butcher's twine should be centered on the steak. If you find that it's slipping off, which sometimes happens with thin steaks, or steaks that taper due to the shape of the salmon's body, it can help to insert a bamboo skewer through the roll, passing through each of the belly flap pieces and the main meaty portion of the fish, then out the other side. I found that most of my strings here wouldn't stay put, and ended up putting skewers through all my steaks, which you will see below (if you do, winding the string around each end of the skewer will keep the whole thing even more secure).
Brine
20140724-salmon-steaks-vicky-wasik-25.jpg
This is a little tip I got from the chef Bryan Voltaggio, who once told me he soaks just about any fish he's about to cook or grill in a salt-water brine for 10 to 15 minutes.
I think it's a good tip. First, the salt-water brine washes the fish, cleansing it of any juices that may be starting to smell a little fishy (the fish's liquids are usually what starts to smell first, even if the fish is still fresh, so rinsing them away isn't a terrible idea). Second, the brine gently seasons the fish. Third, Voltaggio claims that the salt helps firm the fish a little, which can be helpful on the grill where delicate meats are prone to sticking and tearing; I've never confirmed this with side-by-side tests, but if it works, great, and if not, it doesn't undo those first two benefits.
Just be sure to dry the fish well once it comes out of the brine, as wet fish is more likely to stick to the grill.
Grill
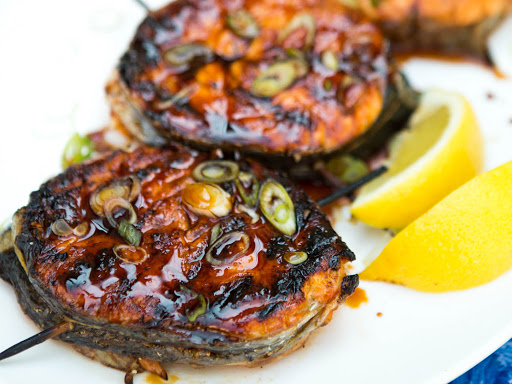
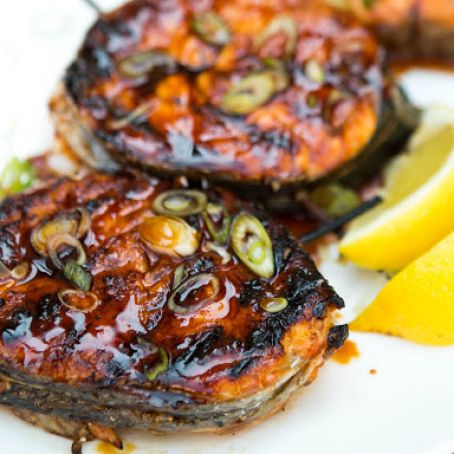
20140724-salmon-steaks-vicky-wasik-26.jpg
You'll also love
-
 Zucchini, Carrot, and Parsnip...
4.1/5
(8 Votes)
-
 Thai Beef and Basil
4.6/5
(5 Votes)
-
 Tuna Nicoise Sandwiches
4.3/5
(6 Votes)
-
 Cookism's Cod in a Pod
4.6/5
(5 Votes)
-
 Baked Salmon
4.6/5
(5 Votes)

Review this recipe