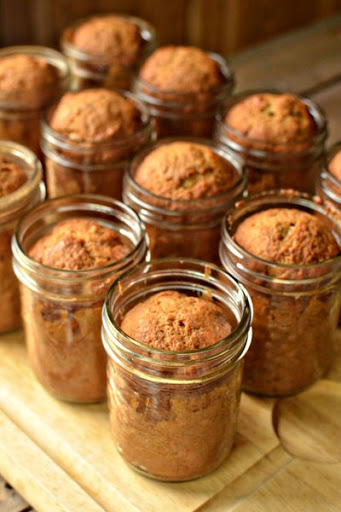
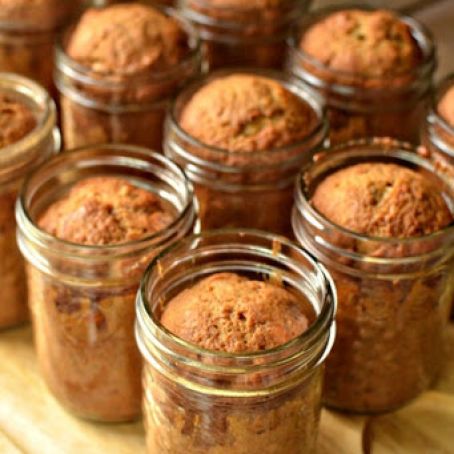
Banana Bread In-A-Jar
By á-25176
I’m crazy about DIY wedding favors that are edible, so naturally I love this banana bread in a jar recipe. It’s the perfect favor for a barn wedding – or any rustic wedding!
I’ve made banana bread countless times, but this is the first time I attempted it in a jar. I honestly thought it would be much more difficult than it is. Read on for the recipe and wrapping instructions.
Also, check out Peach Crisp in a Jar.
Ingredients
- Ingredients:
- 2/3 cup shortening
- 2 2/3 cups white sugar
- 4 eggs
- 2 cups mashed bananas
- 2/3 cup water
- 3 1/3 cups all-purpose flour
- 1/2 teaspoon baking powder
- 2 teaspoons baking soda
- 1 1/2 teaspoons salt
- 1 teaspoon ground cinnamon
- 1 teaspoon ground cloves (I used half a teaspoon because I didn’t want mine too ‘clovey’.)
- 2/3 cup chopped pecans or walnuts
- You will also need:
- 12 250 ml canning jars
- funnel
Details
Servings 12
Adapted from allrecipes.com
Preparation
Step 1
If you planning on storing these for a while, you will need to sterilize your jars. (Some reviewers on Allrecipes.com said the jars will keep up to a year in your pantry if sealed properly. To be safe, I wouldn’t make these more than a week before your wedding. ) Follow the instructions here for how to sterilize jars. I didn’t sterilize my jars because I plan on eating mine within the next week or so.
Preheat oven to 325 degrees F (165 degrees C). Grease insides of a dozen 250ml canning jars. (I wiped mine down with vegetable oil.)
In a large bowl, cream shortening and sugar until light and fluffy.
Mash bananas.
Beat in eggs, bananas, and water.
Sift together flour, baking powder, soda, salt, cinnamon, and cloves.
Add to banana mixture. Add nuts and stir them in with spoon.
Insert canning funnel into mouth of jar and pour mixture into greased jars, filling half full.
Place jars directly on rack in oven.
Do NOT put lids on jars for baking. Be careful to keep the rims clean, wiping off any batter that gets on the rims. Bake for 45 minutes.
Don’t worry if a few rise over the top of the jar a bit like this one. You can press it down with the lid.
While jars are still warm, add lids. Screw on tightly. If you sterilized your jars (as I mentioned, I didn’t because I didn’t plan on storing mine), listen for the ping once you have added the lids; this means that the jar is sealed. If you miss the “ping”, wait until they are completely cool and press on the top of the lid. If it doesn’t move at all, it’s sealed.
Find some pretty vintage fabric and trace a circle. I used a bowl and traced around it with a pencil.
Cut out the circle.
Make a ‘ribbon’ by ripping a piece of vintage fabric.
Fringe the edge of the circle and tie the ‘ribbon’ around the jar. Add a tag and you are good to go!
I love the look of mix n’ match vintage fabrics! Especially vintage fabrics. (Most of the fabrics I used were from vintage bed sheets. Just like these buntings.)
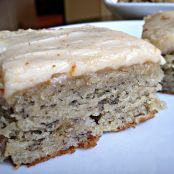
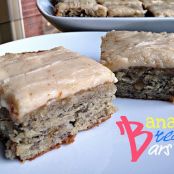
To remove the cake, simple slide a butter knife around the loaf and it will pop out.
You'll also love
-
 Leftover Turkey Gumbo
4.7/5
(10 Votes)
Leftover Turkey Gumbo
4.7/5
(10 Votes)
-
 Blackberry Basil Pie
4.6/5
(18 Votes)
Blackberry Basil Pie
4.6/5
(18 Votes)
-
 Easy Clementine Olive Oil Cake
4.5/5
(17 Votes)
Easy Clementine Olive Oil Cake
4.5/5
(17 Votes)
-
 Pineapple Delight Dessert
4.1/5
(55 Votes)
Pineapple Delight Dessert
4.1/5
(55 Votes)
-
 Banana cookies with brown sugar...
4.2/5
(45 Votes)
Banana cookies with brown sugar...
4.2/5
(45 Votes)
Review this recipe