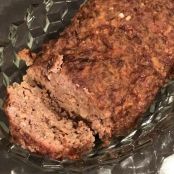
Secrets Of Cooking Beef Prime Rib And Other Beef Roasts On The Grill (And This Method Works Indoors If It's Too Cold For You, Wimp)
By AzWench
Is there anything more impressive and luxurious than a big juicy prime rib roast? Well it's easy to make outdoors and it definitely tastes better (but these techniques work fine indoors).
NOTE. Although this procedure and recipe is primarily for Prime Rib, the method holds true for all beef roasts, chuck, shoulder, sirloin, and round.
Our goals:
1) Maximum tenderness and juiciness. This cut is at is best when cooked to 125 to 145°F internal temp, and my preference is medium rare, when it is not longer purple but deep red, but not yet pink, at 130 to 135F.
2) Crust. We want a deep dark crunchy crust enriched by salt, herbs, and spices mixing with beef juices, and driet to a bark by the roasting process.
3) Even color. We want red color bumper to bumper with no gray or tan meat beyond 1/4" deep. We don't want a rainbow of colors starting with a band of gray meat below the crust, then tan, then pink, and finally, in the center, just a bit of properly cooked red meat.
4) Easy carving. We don't want a struggle, we don't want juice all over the table cloth, and we don't want to look like more foolish than usual.


Ingredients
- 1 beef rib roast bones on, about 3 bones wide, 6-8 pounds before trimming
- Table salt
- Rub
- 1 teaspoon dry Mrs. O'Leary's Cow Crust per pound of meat
- 1 teaspoon olive oil or other cooking oil per pound of meat
- Gravy
- 3 beef ribs
- 2 medium onions, root end removed, skin left on, and cut into quarters
- 2 carrots, peeled and chopped into 1" lengths
- 1 stalk celery, leaves left on, cleaned, and chopped into 1" lengths
- 3 tablespoons soy sauce
- 2 dried mushrooms
- 1 cup dry red wine
- 1 teaspoon leftover rub
- 1 bay leaf
- 32 ounces of low sodium beef stock
Details
Preparation
Step 1
The methods:
1) Go boneless. We will remove the bones from a prime rib roast so it browns on all sides because everybody loves the brown bits. The bones cover almost 1/3 of the surface reducing the amount of crust significantly. Contrary to myth, bones do not add flavor to dry cooked meats. We'll save the bones for another great meal or use them to make a great gravy. More on this below.
2) A wet rub. We will coat the meat with a paste of oil, herbs, spices, and salt that will create a flavorful crust.
3) Let it sit at room temp. Don't worry, it is safe. But sitting at room temp is like getting a head start. If we are cooking 38°F meat to 130°F, it has to travel 92°F. If we let it come to room temp of 72°F, it only has 58°F to travel. We have cut cooking time in half and we have taken a giant leap towards uniform color.
4) A great gravy. We will make great a gravy from the ribs and amp up the flavor by letting it sit in a drip pan below the roast.
5) Just a kiss of smoke. If we are cooking outdoors, we will add wood chips to the fire, just a few, to give it an exotic smoky undertone in the background.
6) Reverse sear. We will cook the interior with indirect convection heat with the lid closed at first and sear it with the lid open at the end of the cook with direct radiant heat to create the best crust.
Let's get the name right
Let's start by getting the terminology right. Chances are that gorgeous hunk-o-meat in the butcher case is not technically a "prime rib".
"USDA Prime" grade meat, with web-like threads of fat running through the muscles for added taste and texture, is an expensive grade that is sold primarily to restaurants. Most of what we see in stores is USDA Choice or USDA Select.
We call it "prime rib" because it comes from a section called the rib primal and that's what it was called before the USDA grading system was created. What your grocer has is more properly called a rib roast than prime rib if you want to be technically correct, but you can call it prime rib if you want. Everybody else does.
Choice grade is going to make you a pretty darn good dinner because the longissimus and spinalis muscles, located along the back of the steer, are tender and juicy on all but the oldest, crankiest bulls. If it is not labeled USDA Choice, get Certified Angus Beef (CAB). CAB members promise that it is choice or above.
You can order USDA Prime grade meat if you wish, and it's a real treat, but bring a wheelbarrow full of cash. Otherwise ask your butcher for "top choice" which is the best looking most marbled choice grade roast in the house. This is one of those moments when knowing your butcher's name comes in handy.
Rib roasts are usually available in two forms, with the ribs still attached, or boneless. I like to get mine with the bone on, and then I remove the bones so I can season the meat on all sides and then I can cook the ribs separately or use them for the gravy.
Click here to learn more about the different grades of beef.
Why go boneless?
I know you've heard that the bones add flavor. The fact is they don't. Not in a dry cooked roast. It's a myth based on the fact that the bones add flavor to stews and braises. But not roasts.
Think about it. Beef ribs are a honeycomb of marrow inside a casing of hard calcium wrapped in a sheath of leathery connective tissue. The marrow is full of flavor but it is not getting through that wall of calcium, and the calcium is just not getting through the connective tissue, not that we want it to. A small amount of the connective tissue will gelatinize, but not much, and it is not going far, not more than 1/16" into the muscle tissue.
If you leave the bones on, they make an effective base upon which to stand the roast (hence the name standing rib roast), but they act like a heat shield at first blocking heat until they get fully hot and then they conduct heat and continue to cook the meat after you take it out of the oven. We don't want one part of the meat lagging behind the rest and then continuing to cook when the rest has stopped. We want the meat to cook evenly throughout. No surprises.
Most importantly, the bones keep 1/3 of the surface from browning and developing that wonderful rich crust. The crust is made of brown flavors, created by the Maillard reaction and caramelization, and it isa real taste treat. I know that gnawing on the bones is fun and tasty, but I submit that if you remove them and make an second meal of them, roating both sides of the bones, they will taste better. Barbecue beef ribs are a blast.
Another reason to remove the ribs before cooking is because they are a pain to remove at the dinner table when you are carving. Unlike a pork roast, you just cannot cut a slice of roast that is one bone wide. One beef bone wide is too much for a normal person. It's enough for two. To avoid this some people remove the rib slab before cooking and put seasoning on the meat and then tie the bones back on. Fine. But those seasonings and the surface under the bones still don't brown. So you get intense raw spices and herbs.
On the other hand, if you submerge the bones under water, much of the goodness is dissolved and they produce immense pleasure, especially as the marrow dissolves into the liquid. Bones are the secret to memorable stews and braises.
So there are two ways to go with the bones. (1) If they have enough meat on them you can get two meals from your rib roast by saving the bones so they can be smoke roasted Texas or Chicago style or braised. Or (2) you can use them to make the gravy for the rib roast! That's what I do.
Your butcher should be willing to remove the bones for you. If you get a roast with ribs on, you can remove them easily yourself. Just run your knife on or above the bones leaving on as much or as little meat as you wish. If you plan to use them for gravy, cut close to the bone. If you plan to make barbecue beef ribs, leave on a bit of beef. Some butchers routinely remove the ribs and then tie them back on because they assume you want to cook with them on, as most people do. By tieng them back on the butcher is making it easier to carve the roast. If that's your situation, I recommend you remove the string and the bones will come right off.
If you insist on cooking with the ribs actually attached, you should make sure the butcher removes the chine for you. That's the end of the rib bone that was connected to the spine. Most of the time is has already been removed, but if it hasn't it can be a pain to cut through when you try to separate the bones. Having the butcher do this makes carving a lot easier.
Even if you are cooking a boneless roast, I recommend you tie it every inch to hold it together and to help make it round which helps it cook more evenly. Your butcher might do this for you.
Prime Rib Recipe
Makes. A typical rib roast weighs about two pounds per bone widthwith the bone on, depending on the size and age of the steer. Allowing for fat and bone waste and shrinkage, about 20%, you should buy 1 pound per person, or 1 bone width for two people. That will be more than enough and guarantee leftovers for superb roast beef sandwiches (most roast beef is made from sirloin, a tougher cut).
Preparation time. 20 minutes to make and apply the dry rub, 1 to 24 hours to marinate, and 2 to 3 hours to come to room temp before cooking.
Cooking time. It is important to understand that there is no easy rule for the timing of a prime rib, but there are some guidelines here. The most important determinant of cooking time is the thickness of the meat, not the weight, and cooking time can vary significantly depending on a number of other variables: Bone on or bone off, how cold the meat is when you put it in the heat, the ambient temp outside, how well your grill holds temp, how long you leave the hood open when you check the drip pan, and how often you show it to your wife, neighbor, and guests.
Remember, you cook with a thermometer, not a clock, and your grill's thermometer is not reliable. Many are off as much as 50°F, even on fancy grills! You really need a good digital oven thermometer and another good digital meat thermometer. Please read my article on thermometers.
The cooking times below are highly approximate and assume you have a good oven thermometer, a good meat thermometer, the bone has been removed, and the meat has been at room temp for 2 to 3 hours before cooking. As insurance, I strongly recommend that you start earlier than you think you will need and that you have on hand a faux cambro, a plastic beer cooler in which you can hold the meat and keep it warm if it finishes early. Click the link to read more about how to set up a faux cambro.
Target temps
Most rib roasts are served rare to medium rare in the center. Scientists have measured the force it takes to shear the meat, in other words how tough it is, and it is at its most tender in the medium rare range. They have also measured moisture, and beyond medium rare it begins to dry out. Now a lot of people are squeamish about the red liquid. They need to know it is not blood! It is a protein liquid from within the cells called myoglobin. All the blood was drained long ago. So stop calling it blood! I cook mine to 130°F. Click here for more about ideal meat serving temps and a handy clip-out chart.
Rare (bright purple red). 120 to 130°F in the deepest part of the center
Medium Rare (bright red). 130 to 135°F
Medium (rich pink). 135 to 145°F
In order to reach 130°F in the deepest part of the meat, if the roast has been at room temp for 3 hours, if it is roasting at 325°F, if it is hovering above the roasting pan at least 2", and if you sear at the end of the cook, here's the approximate timing. If you must start at fridge temp, then add about 20% to the roasting time.
3 ribs, 7 to 8 pounds: 1.25 to 1.5 hours, plus 20 minutes searing over direct heat, plus 20 minutes resting
4 ribs, 9 to 10 pounds: 1.5 to 2 hours, then 20 minutes browning over direct heat, plus 20 minutes resting
5 ribs, 11 to 13 pounds: 2 to 2.5 hours, then 20 minutes browning over direct heat, plus 20 minutes resting
6 ribs, 14 to 16 pounds: 2.75 to 3 hours, then 20 minutes browning over direct heat, plus 20 minutes resting
7 ribs, 16 to 18 pounds: 3 to 3.75 hours, then 20 minutes browning over direct heat, plus 20 minutes resting
About the mushrooms. Any dried mushroom will do. If you have morels, they'd be my first choice, but their pricey, so porcini, wood ears, whatever. They will add umami, a savory flavor amplifier.
Serve with. A big red wine.
Do this
grilled prime rib roast1) 48 to 72 hours hours before cooking. Remove the rib bones and use them for the gravy. The bones do not add any flavor to the meat.
Trim off excess fat. Go ahead and trim right down to the meat. You don't need a fat cap. Melting fat cannot penetrate muscle fiber so it does not add flavor. The meat is not cooking for a long time nor at a high temp so you don't need the dripping fat to baste the meat. If you leave too much on, people will trim it off when you serve it and they will not get to taste the crust. After the fat is trimmed, set it aside for use in making the gravy.
Now sprinkle the meat liberally with table salt and place the roast on a wire rack above a big roasting pan. Leave it uncovered. This will simulate dry aging a bit by allowing some moisture to evaporate and concentrate flavor. Don't worry, there's plenty of moisture remaining in the meat.
2) About 24 hours before cooking. Make a spice paste like my recipe for Mrs. O'Leary's Cow Crust, a blend of herbs, spices, and mixed 1:1 with oil. The oil releases the flavors in the herbs and spices, helps it penetrate the meat's surface, and helps with browning and forming a crust. Let it sit for about 1 hour before applying it to the meat. Do not use Meathead's Memphis Dust or any rub with sugar in it.
Pat the meat dry with paper towels and pour most of the paste on top of the roast. Spread it around all visible surfaces working it into the meat. Turn the roast over and pour the rest on the bottom and work it around.
3) Make it as round as possible. After the bones are removed, the roast is sort of tear-drop shaped. Tie it with string every 1" to make it rounder. This will help it cook more evenly. Put it back in the fridge.
4) Make the gravy. You really won't need the gravy for the meat, but you will for my Garlic Mashed Potatoes, and you should make my Garlic Mashed Potatoes. Yes you really should. And you just might like the gravy on the meat. If nothing else, you can use it later for Italian Beef Sangwitches or for rice or soup. There is no end of uses for a good rich home made beef stock. But if you want to skip the gravy, nobody will want it unless you overcook the meat.
If you have a bandsaw, cut the bones in half so more marrow is exposed. Throw the bones on a hot grill until they are brown on both sides. Get a big pot and put all the bones in it. Add the fat. Don't worry, we'll discard it later, we just want to extract flavor from it. Add everything else. If there is no leftover rub, add some of thyme, rosemary, and garlic powder. Turn it on low and let it simmer for about 3 hours, lid off. Occasionally skim off any foamy scum. Don't worry about skimmimg the fat yet. And don't worry about alcohol, almost all of it boils off. Nobody will get tipsy.
After about 3 hours fish out the bones and any other large solids and discard them. Then run the stock through a mesh strainer. Refrigerate it. After several hours the fat will rise to the top and form a thick hard layer. Peel it off and discard it. Back in the fridge it goes for now. What remains is a fine beef stock.
5) About 3 hours before cooking bring the roast out of the fridge. Take the meat out and let it sit at room temp. Letting it sit at room temp warms it and gives the meat a running start on cooking. If you are going to heat a large mass of meat from 70°F in the center to 130°F it will go a lot faster than if you start it at 38°F, and the interior color will be a lot more even. Any microbes living on the surface will be killed during cooking.
6) Prepare the grill. Set up your grill or smoker for 2-Zone or Indirect heating and preheat the indirect zone to 325°F. You don't want to cook so hot that the meat burns on the outside before it is done on the inside. Clean the grates thoroughly before the gravy/drip pan goes on.
Place the pan at least 2" below the place where the meat will go in the indirect zone. You not want to put the roast in the pan with the liquid. We are roasting this meat with dry heat not boiling or braising it. Do not use a roasting rack that puts the meat into the pan. We want warm air circulating around all sides of this meat. On a gas grill place the empty gravy pan below the cooking grate on top of the deflector bars that cover the burners. On a charcoal grill place it on the grate that the charcoal will go on, and push all the coals off to the other side. On a pellet grill put the pan on top of the heat deflector. On a Weber Smokey Mountain or other bullet smokers, you can use the built-in water pan as the drip and gravy pan. Just make sure it is scrubbed clean on the inside. If you can't get it clean use a disposable aluminum pan on the lower shelf.
Now put the beef broth in the drip pan and add hot water until it is about 1" deep.
For more info on setting up your cooker, read my articles on how to setup a gas grill, a charcoal grill, a bullet smoker, and an offset smoker.
7) Put the meat on the grill. Oil the meat surface by scooping any drippings from the pan, and if you wish, take your pepper grinder and give it a fresh dusting of freshly ground black pepper. If you have a meat thermometer with a probe on a cable, insert it now so the tip is dead center in the thickest part of the meat. If you don't have a probe you can leave in the meat, you absolutely must have a good instant read meat thermometer, preferably a digital, to get this meat off properly cooked. Dial thermometers are notoriously inaccurate and slow reading. Read my Thermometer Buying Guide to learn how they work and which are the best.
Place the meat in the indirect zone about 2" above the drip pan where it is surrounded by 325°F air. You don't want to read the air temp in the dome, you need to read the air temp on the grate next to the meat.
Unlike conventional roasting recipes, we will not sear the meat at this time. Be patient. We do not want high heat on the outside yet. We want to gently heat the roast all over so the inside warms gently and evenly. It is a myth that searing at the beginning of a cook seals in moisture. It does no such thing and, in fact, it may make the meat drier. But darkening the exterior generates deep rich flavors from a chemical reaction called the maillard effect and caramelization of sugars. Darken it too much and you can carbonize the surface and burn all the good stuff in the paste. So we will roast the meat first slowly with convection heat and then sear it just before taking it off with high radiant heat, a technique called reverse sear.
8) Smoke. If you want a smoke flavor in the background add just a little bit of hardwood or fruitwood to the hot part of the cooker, about 2 to 4 ounces max. Don't overdo the smoke. A little bit is nice, but too much can ruin it. I cannot overemphasize this. What kind of wood? I don't think it makes a huge difference since you are using so little. Pick your favorite. I usually grab a fruitwood like apple.
9) Monitoring your meat. You will want to look under the hood occasionally during the cook, but make it infrequently and quickly. During the cook check the meat temp after 60 minutes and then every 15 minutes. Check the drip pan, keeping at least 1/2" of liquid in the pan. Add water if necessary. Do not let it dry out and burn. Look at the meat and if one side is getting too dark, rotate or turn the meat, otherwise there is no need to touch it. If you have a problem with your cooker, perhaps the gas runs out or the temp just won't stay at 325°F, or it is really cold outside, you can bring it inside after about an hour and finish it in the oven. By then all the smoke flavor is already in the meat.
10) Searing. When the temp in the deepest part of the interior reaches 115°F, take the meat off the rack and place it over the hottest part of the grill. If necessary, remove the drip pan and bring it inside. Raise the lid and stand by your grill, as Tammy Wynette once sang (click the link for my version of her song). Get the surface a deep dark brown by leaving it on the hot part for about 3 to 5 minutes. Roll it a quarter turn and repeat on all four sides. We leave the lid up because we no longer want to roast the interior. We are focusing the heat on the exterior now. During this process, the interior will rise another 5 to 10°F anyway. Check the temp again and take it off at 5°F lower than your target temp, preferably 125°F.
If you are cooking indoors or on a pellet grill, you can sear under the broiler indoors. If you have a small gas grill just crank it all the way. On a gas smoker, remove the water pan and the wood pan and put the meat down close to the flame.
carryover cooking11) Resting. Let it rest 20 minutes before cutting. The temp will rise about 5°F in that 20 minutes, a phenomenon called carryover. In this illustration, on the left we have a piece of meat while it is being cooked at 325°F. It is absorbing heat from all sides, the outer edges are hottest and the heat is passed to the center by conduction. In the center the meat has been removed from the oven. Heat continues to be passed towards the center slowly warming it even though it is sitting at room temp, say 70°F, and some of the heat is escaping into the surrounding air. On the right, the meat has come close to an even temp throughout and now it is cooling as more heat escapes.
In addition, the water pressure inside the muscle cells will go down a bit and less juice will come gushing out when you slice. Remember, if you have not cooked it past well done (and why would you do that?) then you should serve it within an hour. At temps like medium rare, microbes can grow rapidly.
12) Finishing the gravy. While the meat is resting, pour the liquid through a strainer and taste it. It should be thin and rich. If it is wimpy, dump it into a frying pan, turn the heat to high, and reduce it. It will reduce faster in a wide frying pan than in a narrow sauce pan. Taste and add salt if needed only after it is the proper consistency, but it shouldn't need it because of the drippings.
13) Serving. Remove the string. Use a really sharp knife and cut servings about 3/4" thick. Pour any drippings from the cutting board into the gravy. If you want to amp it up to 11, serve my Secretariat Horseradish Cream Sauce on the side.
Mrs. O'Leary's Cow Crust
This is a different kind of spice rub for beef, especially beef roasts like prime rib, flank steak, and chuck steaks. It's both a dry rub and a wet rub.
Most spice rubs are a mix of herbs and spices and we rub them into the meat before cooking. This rub starts out that way, but then we transform it into a thick oil-based paste. The idea is, because most of the ingredients are oil soluble, by mixing them in oil we can extract more flavor and get it into the meat. Normally marinades and rubs don't go very deep into the meat, but they can significantly change the composition of the surface, and the addition of oil to the mix helps transmit heat to the surface and enhanced browning by simulating the effects of frying. It's excellent on any cut of beef, especially roasts.
As background for this recipe, read these articles, The Zen of Herbs & Spices, The Zen of Chiles, the Zen of Garlic, and The Zen of Salt.
Beef Rub Recipe
Makes. 5 tablespoons of dry rub, and when mixed with oil makes enough paste for a 10 pound roast.
Preparation time. 15 minutes.
Ingredients
2 tablespoons ground black pepper
2 teaspoons dried rosemary leaves
2 teaspoons dried thyme or oregano
2 teaspoons table salt
1 teaspoon garlic powder
1 teaspoon onion powder
1 teaspoon paprika
1/2 teaspoon cayenne or chipotle powder
5 tablespoons olive oil
Optional. Add 1 teaspoon ground chipotle powder for a little heat.
Do this:
1) Mix everything except the olive oil in a bowl. Store in a jar for use later or proceed to the next step if you plan to use it now.
2) When it is time to use the paste, mix 1 part of the dry rub with 1 part oil to make a paste.
Optional. Add 2 tablespoons prepared horseradish.
3) Pat the meat dry with paper towels, pour the paste on and rub it in. You can cook right away, but if you can leave it sit for 24 to 48 hours it will penetrate a little better (but it will not go more than 1/4" deep).
You'll also love
-
 Open-face Blueberry Pie
3.8/5
(6 Votes)
Open-face Blueberry Pie
3.8/5
(6 Votes)
-
 Cucumber Collins
4/5
(4 Votes)
Cucumber Collins
4/5
(4 Votes)
-
 Roasted Pork Tenderloin with...
3.8/5
(10 Votes)
Roasted Pork Tenderloin with...
3.8/5
(10 Votes)
-
 Beef Stew with Dill
4.1/5
(11 Votes)
Beef Stew with Dill
4.1/5
(11 Votes)
-
 Crock Pot Asian-Inspired Beef Ribs
4.5/5
(2 Votes)
Crock Pot Asian-Inspired Beef Ribs
4.5/5
(2 Votes)
-
Cooking Prime Rib in a Convection...
3.6/5
(297 Votes)
Review this recipe