
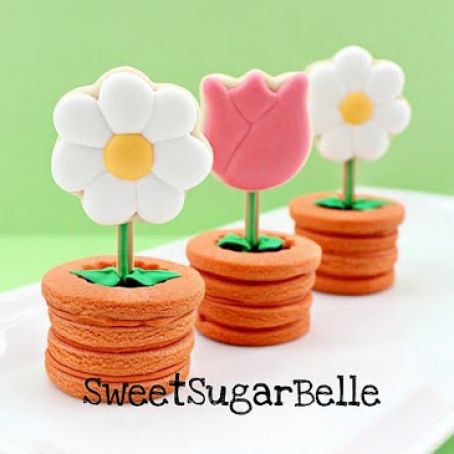
Terracotta Cookie Pots
By kmad
 1 Picture
Ingredients
- bamboo forks trimmed to 2 inches
- terracotta and green piping icing
- black flood icing
- black sanding sugar
- 3 1.5 inch cookie
- 2 inch cookie ring
- #3 and #67 Wilton tips
- mini-flower cookie
Details
Servings 6
Preparation
Step 1
First, I baked the cookies. The cutters I used are shown below. To elaborate on the list above, every finished cookie requires three 1.5 inch rounds, and one 2 inch round with the middle removed, which technically makes it a ring, so we'll call it that. They also require one mini-flower cookie, no larger than 1.5 inches. If you don't have a mini-flower, you can make a round work.
will let you do the math since I never much cared for that subject.
Tint the dough you will be using for the pot whatever color you choose, I used a mix of orange, tulip red, and warm brown. For more help on mixing colors, see my color chart {HERE}.
THIS STEP IS IMPORTANT! Immediately after baking, insert a trimmed bamboo stick into a 1.5 inch cookie for each pot you plan to make.
Let those cool and then it's time to begin putting the cookie together. First use the terracotta icing to make a ring around the "stick cookie".
*A little FYI...the cookie in the bottom left corner is how NOT to do it. Refer to the middle one.
Next, fill the empty area with black flood icing. Not only does this make the cookie look more realistic, it also helps to hold the stick firmly in place.
While the black icing is still wet, sprinkle it with black sanding sugar to look like dirt. Let it dry completely, preferably overnight.
Also, have several mini-flower cookies decorated and ready to go. A good technique for decorating these would be my 20-second icing. It would be a good idea to decorate them the same day you complete the steps above so they will all be dry and ready to go on day two.
Now to add the flower. This is where the shelf-stacker comes into play. If you don't know what these are, they are little shelves that you slip inside your cupboards to add a shelf where there isn't one.
It just happens that the cookies fit perfectly into the slots so that they will lay flat. I got this one at Walmart, and have only used it specifically for this purpose.
Use a #3 tip to add green royal icing for the "stem" as pictured below, then stick the finished mini-flowers onto the top of the stem.
Let them dry well. About 2-3 hours I'd estimate...
Then it is time to connect the two cookie parts as pictured below.
Use a #67 Wilton leaf tip to add leaves,
And finally, you have FLOWERS in POTS!
Review this recipe