
Carrot Cake, GF and FODMAP
By MaryEllen
Our low FODMAP carrot cake is gluten-free and super easy to make - you don't even need a mixer, although one comes in handy for the frosting.
 1 Picture
Ingredients
- Cake:
- 2 cups (290 g) low FODMAP gluten-free all-purpose flour, such as Bob’s Red Mill Gluten Free 1 to 1 Baking Flour
- 2 teaspoons baking powder; use gluten-free if following a gluten-free diet
- 1 teaspoon baking soda
- 1 teaspoon salt
- 1 cup (240 ml) vegetable oil, such as canola or rice bran
- 3/4 cup (149 g) sugar
- 1/2 cup (107 g) firmly packed light brown sugar
- 4 large eggs, at room temperature
- 2 teaspoons cinnamon
- 1 teaspoon vanilla extract
- 1 pound (455 g) carrots, scrubbed, stem ends trimmed and discarded, finely grated
- 3/4 cup (125 g) raisins
- 3/4 cup (75 g) toasted walnut halves or whole pecans, chopped
- Frosting:
- 6 tablespoons (3/4 stick; 85 g) unsalted butter, at room temperature, cut into pieces
- 3 cups (270 g) sifted confectioners’ sugar
- 1/2 cup (113 g) Green Valley Organics lactose-free cream cheese
- 2 teaspoons lemon juice, preferably freshly squeezed (see Tips)
Details
Servings 24
Preparation time 25mins
Cooking time 60mins
Adapted from fodmapeveryday.com
Preparation
Step 1
For the Cake: Position rack in the middle of the oven. Preheat the oven to 350°F/180°C. Coat two 9 x 2-inch (23 cm x 5 cm) round cake pans with nonstick spray, line bottoms with parchment rounds, then spray parchment.
Whisk the flour, baking powder, baking soda, and salt together in a large mixing bowl to aerate and combine; set aside.
Whisk together oil, sugar and brown sugar until well blended in a mixing bowl. Whisk in eggs one at a time until mixture is smooth and combined. Whisk in cinnamon and vanilla, then use a large, sturdy spatula to fold in the carrots, raisins, and nuts.
Pour wet ingredients over dry and fold in until combined. Divide batter evenly in prepared pans and smooth batter with an offset spatula.
Bake for about 30 to 35 minutes or until a toothpick shows a few moist crumbs. Cool pans on racks for 10 minutes. Unmold, peel off parchment, and place directly on racks to cool completely. Layers are ready to fill and frost. Alternatively, place layers on cardboards and double wrap in plastic wrap; store at room temperature and assemble within 24 hours.
Make the Frosting: Beat the butter in a large bowl, using an electric mixer on medium-high speed, until very creamy and smooth, for about 2 minutes. Add the confectioners’ sugar, lemon juice, and cream cheese and begin by beating on low speed. As the frosting comes together and you aren’t in danger of confectioners’ sugar flying everywhere, turn the speed up to high and beat until very creamy and smooth. Scrape down the bowl once or twice during the process to make sure everything is blended evenly and smoothly. The frosting is ready to use and best if used immediately.
Apply the Frosting: Decide which frosting application you are going to use. For either approach, place one cake round on serving platter. Spread frosting on top of this bottom cake layer, going all the way to the edges. Place the second layer on top.
If you want to leave the cake sides bare, apply the remaining frosting just to the top of the uppermost layer, leaving the sides naked and pristine.
If you want to schmear the sides with a thin veil of frosting, simply do just that! I like to use a small straight icing spatula. Apply a thin layer to the sides and be a little more generous for the top.
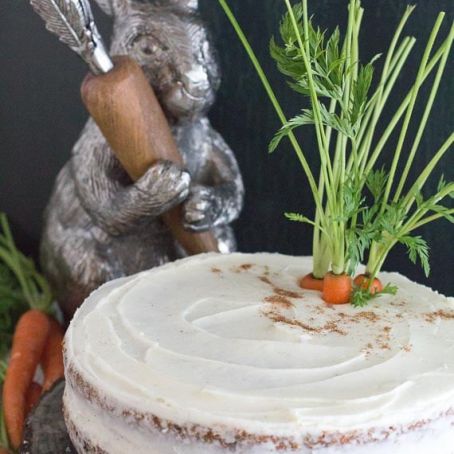
The cake is done and needs no additional décor. If you want to replicate the images, simply by some slender fresh carrots with their tops attached and trim the carrots themselves and then press them into the frosting right before serving. Some extra cinnamon can be sprinkled on top to look like dirt if you'd like.
The cake may be served immediately or refrigerated for up to 2 days under a cake dome (so as to not disturb the frosting). Bring to room temperature before serving.
Tips
I have a love/hate relationship with freshly squeezed lemon juice. Well, “hate” is too strong of a word but let’s just say it can be complicated. The fact is that nothing compares to the bright, clean flavor of freshly squeezed lemon juice, yet I do understand that it is common not to have fresh lemons around and/or they can be pricey. And when there is a recipe like this where the lemon juice amount is small, it is nice to have a convenience product to use. There is one, and only one, lemon juice product that I recommend and that is the frozen Minute Made Premium 100% Pure Lemon Juice. It has an incomparably fresh lemon flavor with no preservatives or additives; no other bottled or commercially available lemon juice comes close. It is a recipe developer’s favorite and we think you will like it, too. Buy a couple of bottles. Have one in the fridge and one in reserve in the freezer. Look for a black and yellow box in the freezer section near the concentrated juices. Inside is a 7.5 ounce/221.8 ml bright yellow squeeze bottle that is easy to find once stored in the refrigerator and easy to handle. You can easily squeeze out 1 teaspoon if that is what you need. Once defrosted it lasts for 8 weeks (refrigerated) and there is even a little area on the bottle where you can write in the date when it was initially defrosted.
Review this recipe