
Peanut Butter Freezer Pie, GF
By MaryEllen
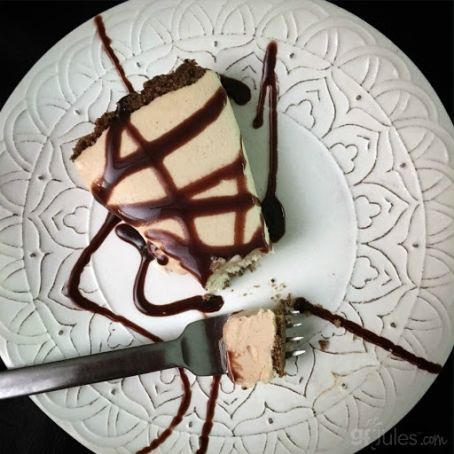
This freezer pie really is quite perfect for nearly anything. Peanut butter and chocolate are a flavor combination that is truly hard to beat, so combining them in this pie was a natural choice. And on a hot day, this cool pie will make everything better. I promise.
 1 Picture
Ingredients
- cookie crust:
- Ingredients
- 2 1/2 -3 cups gluten-free chocolate chip cookie crumbs (approximately 16-18 3″ cookies)*
- 2-3 Tbs. melted butter or nondairy alternative (I used Earth Balance® Buttery Sticks)
- pie filling:
- 1 1/2 cups confectioners’ sugar
- 8 ounces cream cheese, dairy or non-dairy (I used Go Veggie® vegan cream cheese)
- 1 cup creamy peanut butter (Earth Balance® Natural Peanut Butter)
- 1/2 cup liquid creamer or half-and-half (I used So Delicious® Vanilla Coconut Creamer)
- 18 ounces whipped topping, thawed if frozen, dairy or non-dairy (I used So Delicious® CocoWhip – either original or low fat; I used one of each)
- chocolate syrup drizzle, optional (I used Ah!laska® Organic Non-Dairy Chocolate Syrup)
Details
Adapted from gfjules.com
Preparation
Step 1
Instructions
Pie Crust:
Have ready a 10 – 11-inch tart pan with removable bottom or 10 inch pie pan.
Be sure your cookies are crispy before trying to crush them into crumbs. If fresh baked, take several cookies at a time and place them in the freezer for 5-10 minutes (unwrapped). This will harden and dry them, making them easier to crush into crumbs.
To make the crust, process in a food processor or use a gallon size zip-top bag (freezer bags are stronger) and fill it with approximately 2 1/2 – 3 cups of chocolate chip cookies. Remove the air from the bag and seal, then begin rolling over the cookies with a rolling pin, crushing the cookies to a very small crumb size — if the cookies aren’t crushed quite finely, the crust will fall apart when cut.
(To make the crumbs even more chocolately, add some extra chocolate chips to the food processor — the top layer of crumbs shown has chocolate chips added.)
Once uniformly crushed, measure out to be sure you have enough crumbs – repeat if you need more crumbs. Note: this step is even easier using a food processor instead! If you want your crust to be extra chocolatey, add 1/3 cup chocolate chips to the food processor and process with cookies
Pour the crumbs into a medium-sized bowl and stir in the slightly cooled, melted butter or Buttery Sticks, stirring with a fork until the crumbs begin to stick together when pressed. It is important that the mixture not be too wet, so if the crumbs are very wet at this point, crush more cookies to add to the mixture. The consistency is right when you can press the mixture between your fingers and it sticks together but is not at all drippy with butter.
Transfer the crumb-butter mixture into a pie pan and press with your fingers to create an even thickness along the bottom and sides of the pan. If using a tart pan with removable bottom, you may find it easier to place the pan on a cookie sheet so the crust bottom is not disturbed during transfer.
Refrigerate the crust for 20 – 30 minutes to help it set. Preheat oven to 350° F (static) or 325° F (convection).
Bake crust for 10 minutes or until firm. Remove to cool completely in the refrigerator or at room temperature before filling.
Peanut Butter Filling:
In a large bowl, beat the confectioner’s sugar and cream cheese until smooth. Stir in peanut butter. Add the creamer or half-and-half. Particularly when using “natural” peanut butter, the consistency of the peanut butter itself can differ markedly, and you do not want this pie batter to be too thin to set up in the freezer, so if you find it is very thin, add 1/4 cup additional confectioner’s sugar. Fold in the whipped topping until uniformly mixed and smooth.
Pour into the prepared pie pan; pour any extra into ramekins or a small casserole dish. Cover and freeze until set up. Remove from freezer 5-10 minutes before serving. If the pie is hard frozen, cut with a sharp knife warmed in water first.
Drizzle with chocolate syrup before serving, if desired.
Review this recipe