
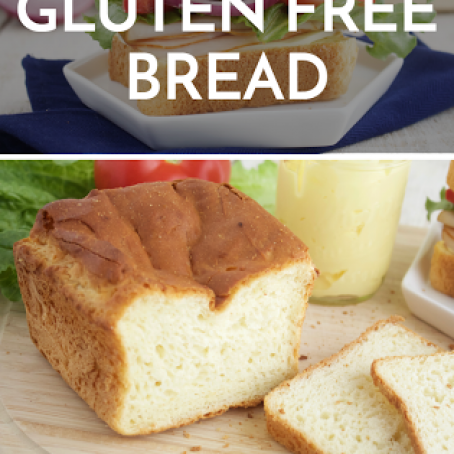
GF Bread that doesn't suck!
By MaryEllen
 1 Picture
Ingredients
- 1 1/3 cups brown rice flour
- 1 1/3 cups tapioca flour/starch
- 1 1/3 cups cornstarch
- 1 Tbsp potato flour (If you can’t find potato flour in the store, you can make your own by blending a handful of potato flakes in your blender.)
- 4 cups Brown Rice Flour Blend (see recipe above)
- 1 Tbsp xanthan gum
- 1 Tbsp gluten-free egg replacer
- 2 tsp salt
- 1/2 cup powdered milk
- 3 large eggs, room temperature
- 1/4 cup butter, room temperature
- 2 tsp apple cider vinegar, room temperature
- 1/3 cup honey
- 1 package (2 1/4 tsp.) active dry yeast (not INSTANT dry yeast)
- 2 cups warm water
Details
Adapted from onegoodthingbyjillee.com
Preparation
Step 1
Prepare two 8-inch bread pans by spraying them with cooking spray.
Add the yeast to the 2 cups of warm water, and stir until mixed. Set this aside to activate while you mix the rest of the ingredients.
Mix the flour blend, xanthan gum, egg replacer, salt, and powdered milk together in a medium-size bowl and set aside.
Put eggs, butter, vinegar, and honey in the bowl of your mixer. Mix together for about 30 seconds using the paddle attachment. The butter will be chunky, and that’s okay!
Add half of the dry ingredients to the wet mixture in the mixer. Mix just until blended, and then add the remaining dry ingredients and mix for another 30 seconds, until blended.
With the mixer on low speed, slowly add the warm water and yeast mixture, then turn the mixer to medium-high speed and beat for 4 minutes. After the 4 minutes, your bread dough should resemble thick cake batter.
Spoon the dough into your greased bread pans. Dip your fingers in water to smooth the top of the dough, if desired. Set aside in a warm place to rise for approximately one hour. While the dough rises, preheat your oven to 375 degrees.
When the dough has risen to about an inch above the top of the pans, place the pans in your preheated oven on the middle rack.
Bake for 45 to 55 minutes, or until the bread’s internal temperature reaches 200 degrees on an instant-read thermometer. (This is very helpful! It’s hard to tell when gluten free bread is done. If you don’t have an instant read thermometer, just use your best guess based on your particular oven.)
Remove the bread from the oven and let cool in pans for 10 minutes. Then remove loaves from the pans and place on a rack to cool completely. (As you can see, I brushed the top of mine with butter when they came out of the oven.)
After allowing it to cool COMPLETELY before slicing. (This is important! Don’t rush it and cut into it while it’s still warm or you will flatten it.) And make sure to let your bread knife do the cutting for you! You provide the “sawing” action, but let the knife blade do the work. Don’t press down, just keep “sawing” across the top until you get all the way to the bottom of the loaf.
A couple of notes about eggs:
Yes, this recipe calls for both eggs and egg replacer. The combination helps create the wonderful springy texture of the finished bread.
Nutritional Information, per loaf
Calories: 675
Fat: 3 g
Carbohydrate: 229 g
Protein: 16 g
Glycemic Load: 2169
Review this recipe