
Paneer - Indian Cheese - Low Fat
By BlueSchmoo
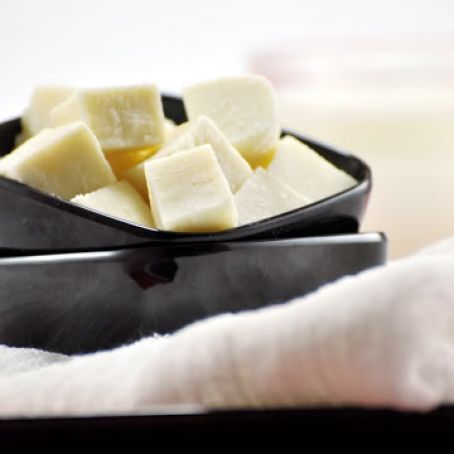
A fresh, unripened cheese, similar to farmer cheese or pot cheese
You can add 1/8 tsp salt if desired.
You can avoid lemon juice and use yogurt only. Then double or triple the quantity of yogurt.
You can replace Fat Free milk with 2% or whole milk as per your choice.
 1 Picture
Ingredients
- 1/2 Gallon Fat Free Milk
- 1/4 Cup NF Yogurt/
- 1 1/2 Tbsp Fresh Lemon juice + more as required
- Muslin or Cheesecloth
Details
Servings 12
Adapted from foodfor7stagesoflife.com
Preparation
Step 1
Use a thick/heavy bottom stock pot to boil milk.
To avoid burning, keep stirring frequently.
Once the milk starts boiling (around 212 F), remove it from heat.
Add yogurt and stir to initiate the curdle process.
Add 1/2 Tbsp lemon juice at a time, stir. Keep watching the curdling process. Add more lemon juice as required or until the milk curdles and separates from whey. Now you will have two components – Cheese and Whey.
In a large bowl, place a cheese cloth/muslin cloth to cover and slightly push it in the center to form a well. If you are not comfortable, place the cheese cloth over a strainer.
Slowly pour the curdled milk. You will see that the Chenna/Cheese settling down over the cloth.
Bring all the sides of the cloth together and tie it. Quickly wash chenna in running water. This will help to remove any lemon flavor.
Now hang it on your cabinet or the kitchen faucets and place the bowl to collect whey.
Gently squeeze it to remove any excess water. You got to be cautious when doing this as it is usually hot.
After 20 minutes shape the chenna in to a circle, square or whichever shape you like your paneer to be. Please do not remove it from cheesecloth while doing this.
Keep a chopping board or a flat plate and place the tied cheese cloth on top of it. Now place 1 or more heavy vessels or any thing that is heavier enough to press the paneer. I have used the bowl that I used to collect way and a heavy skillet. You can use your pestle and mortar, cast iron skillet, a huge box of rice or anything that is available at home.
After 30 minutes, unwrap the cheese cloth and viola you have a home made fat free and organic paneer to relish.
Notes
Add only 1/2 tbsp lemon juice at a time. Stir. Add more if milk has not curdled properly. This will ensure that you don’t pour more than what is needed and hence control the flavor of lemon.
Remove from heat after the milk reaches its boiling point (around 212 F). This will help the milk from burning.
Do not throw away the whey (Liquid that you obtain after your strain cheese). You can replace them instead of water while kneading dough or in soups, stews and curries. You can even create your next batch of paneer with sour whey.
You can place paneer in a zip lock bag and refrigerate upto 1 week. Otherwise, you can freeze them and use it need per basis. If you are planning to freeze I would recommend to cut them into cubes and then freeze. So that you don’t have to thaw the entire block of paneer.
Update: Add ice cubes after the milk curdles. It becomes easier to handle paneer and stops the cooking process of milk. Thanks Sandhya for letting me know about this tip from VahreVah.com.
Review this recipe