
 1 Picture
Ingredients
- 6 oz (3/4 cup) of warm water
- 5 Tablespoons Meringue Powder
- 1 teaspoon cream of tartar
- 1 kilogram (2.25 lbs.) powdered icing sugar
- Note; if your meringue powder has no vanilla flavour (vanillin powder) in it, add a teaspoon of clear vanilla to this recipe.
Details
Servings 1
Adapted from sweetopia.net
Preparation
Step 1
In mixer bowl, pour in the warm water and the meringue powder. Mix it with a whisk by hand until it is frothy and thickened…about 30 seconds.
Add the cream of tartar and mix for 30 seconds more.
Pour in all the icing sugar at once and place the bowl on the mixer.
Using the paddle attachment on the LOWEST speed, mix slowly for a full 10 minutes. Icing will get thick and creamy.
Cover the bowl with a dampened tea-towel to prevent crusting and drying.
Tint with food colourings or thin the icing with small amounts of warm water to reach the desired consistency.
*
Besides your cookies and the ingredients for the royal icing recipe, you’ll need your tools:
1) piping bags
2) elastic bands
3) piping tips(at least #’s 1-5)
4) couplers
5) coupler covers – these aren’t necessary; you can just rest your tips in a damp cloth
4) glasses – to stand your icing bags in
5) clean cloths – a few damp and dry ones nearby
6) toothpicks
7) food gel coloring
One of the most important things I’ve learned about cookie decorating is that if your icing isn’t at the right consistency or thickness, the experience can be very frustrating.
So, once you have made the icing, it ususally needs to be thinned a bit to create the best consistency for decorating. This means that it needs to be fluid enough so that it will flow just enough that it settles into your cookie dam, but not too much so that it runs over.
You may realize that that the icing was thinner before you whipped it for 10 minutes according to the recipe, but it does make a difference in the texture that you mix it that long. Do mix it for 10 minutes and then thin it out if you need to.
Add just drops of water at a time to make the icing runnier. If you add too much water at a time it’s more difficult to thicken it with icing sugar than it is to add water to it.
The trick I use to make sure my icing is at the right consistency, is called the “10 second rule“. Drag a butter knife through the surface of your royal icing and count to 10. If the icing surface becomes smooth in anywhere between 5-10 seconds, then your icing is ready to use. If it takes longer than approximately 10 seconds, the icing is too thick. Slowly add more water. If your icing surface smoothes over in less than 5-10 seconds, it is too runny. Mix your icing longer or slowly add more sifted icing sugar to thicken it.
I learned a slightly different ’10 second rule’, through Sarah Bell at Bonnie Gordon School of Cake Decorating… she likes to dip a spoon into the icing, lift it and let ribbons of icing drop back into the bowl, and count how many seconds it takes to make that surface flat again. (5-10 seconds).
Some people use a thicker consistency icing to outline their cookie shape and then a runnier one to fill it in. I have come to prefer using the same icing to outline and flood because it saves me time. (I don’t have to prepare two icings for each color, prepare two piping bags for each color etc.). That being said, the icing then can’t be too runny, because the outlines will not form properly.
Some decorators like to flood their cookies with a very runny icing, so if you are one of them, prepare two icing consistencies, one thicker, one runnier. The thicker icing should not be so thick that it is dry and curls when you try to pipe it. It should just hold it’s shape when you pipe it onto the cookie.
Once you’ve managed to reach the desired icing consistency, add food paste coloring of your choice. I use a toothpick to slowly add color bit by bit. Because deep, dark colors such as red or black usually require a lot more food paste coloring, I’ll use the end of a butter knife to scoop out those colors if they’re in a tiny container. I should also add that I have come to prefer the Americolor brand for black especially. Americolor uses squeeze bottles which makes adding the color much easier, and it seems to bleed less into other colors.
Another tip when it comes to adding color to your icing; the colors usually deepen with time, so I try to color my icings 24 hours in advance to see if I’m happy with them.
Also, stirring your icing to add color will incorporate air into it, so if you leave the icing sitting for a while the air bubbles rise to the surface, where you can pop them by gently stirring just a little before you add the icing to the piping bags.
One more tip to help avoid air bubbles in your piping bag; massage the royal icing a bit before you twist the top end of the piping bag closed. Press the icing in the bag upwards, starting from the tip and working your way up, pushing out the air bubbles as you go. Then push it back down towards the piping tip.
*
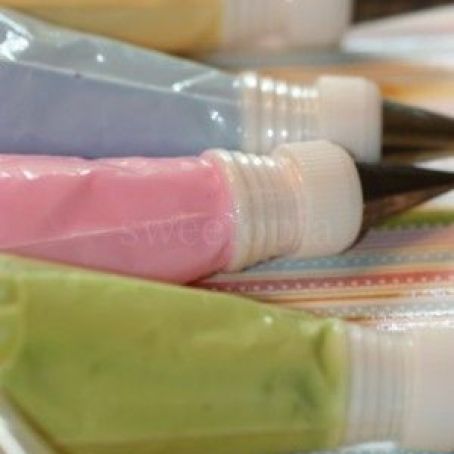
I have disposable and non-disposable piping bags for decorating. Either are fine, however, I tend to lean towards disposable because I can quickly see what color each bag has in it. Important when timing is key! That being said, you could color-code each with a matching elastic if you don’t like using disposable bags. I’ve also tried using squeeze bottles with my students at school, and they’re also great for being able to see the colors easily, they aren’t very messy, and the icing can be kept in them as they’re airtight with the wee little lids. Trying not to lose them with teenage students is a problem though! Sorry guys it’s true! For me, the bottles are really only good for filling in, or flooding, so I tend not to bother with them for the most part.
Cut off the ends of your disposable piping bags, insert the coupler, tip and close it off. I generally use a number 2 or 3 piping tip to outline my cookies and a number 2 – 5 to flood them. The larger the cookie, the larger the piping tip. There are some great tips for small details, such as 00 or even 000, however they clog very easily! I like to use tip #1-#1.5 for smaller details.
Get as many glasses as I have colors out, add a clean, damp cloth to the bottom of each, and set one empty piping bag into each as well, with the opening of the piping bag folded over the rim of the glass. Fill the piping bag with your royal icing. I find it easier to fill the bags with icing when I have two hands free.
Twist the openings of the piping bags closed, and tightly secure them with elastic bands. Work over your icing bowl so that the icing dripping out of the tips doesn’t go all over your work surface. Rest your finished decorating bags back in the glasses until you’re ready to use them.
*
Practice piping on your work surface so that your hand gets some practice before you begin the cookies. I usually find I need a few minutes to play around before my piping improves. I decorate my least favourite cookies, or my extra cookies first; that way if I make a mistake it won’t matter as much!
Outline the cookies first, and wait at least 15 minutes before you flood the inside of the ‘dam’. If the outline is a dark color such as brown or black, I wait 24 hours before flooding the cookie. It lessens the chance that the colors will seep into each other. If you live in a humid climate, air conditioning or a dehumidifier will help prevent color seepage as well.
I should also mention, that if you don’t like the look of the outline on the cookie, outline your cookie and fill it in right away. The icing needs to be at medium consistency for this… not too runny or it will just flow everywhere, and not too thick or it won’t settle smoothly.
To outline the cookies, hold the bag at a 45 degree angle and position the tip at a corner of the cookie. Put enough pressure on the bag so that the icing comes out and start moving towards the direction you’d like your icing to flow at the same time. About a centimeter after you’ve begun your outline, start lifting the piping bag away from the cookie, so that the icing just falls onto the cookie. Start coming back closer to the cookie when approaching another corner. If the cookie is more intricate, or has more corners, you may not be able to just let the icing fall as there won’t really be room to. Also start to apply less pressure as you approach the corners. While decorating, every once in a while I twist and tighten the top part of the bag to create pressure so that the icing flows well.
When your cookies are ready to flood use a #3 – #5 sized piping tip. The larger the cookie the larger the tip. Start at one area and quickly zig zag back and forth until you’ve covered your cookie. Don’t worry if you haven’t filled in every little spot; speed is more important at this point. If there are a few spots that haven’t quite filled in once you’ve basically covered the whole cookie, use your piping bag, a toothpick or a paintbrush (used only for food), to push the icing around and fill in the gaps.
If you would like to add more icing colors to your cookie so that they ”meld’ into the base color, you need to add it right away. The base layer starts to dry quickly so you need to add your next colors as fast as possible. For example, I added these two black lines and one colorful line and then drag a toothpick through them.
The ‘eye’ of the butterfly is then made by layering a few colored dots on top of each other, with the white or light color second last and black last. Dots are easy to make; position your piping bag straight above the area you’d like to pipe and gently apply enough pressure so that just a dot comes out of the tip. Stop the pressure on the bag and lift it away. Take your next color and keep layering, making sure that your dots get smaller each time.
Fill in each wing or every two wings at a time.
Let the cookies dry for 24 hours before you package them.
If you’d like to store them in tupperware instead of packaging them, stack them with the largest cookies on the bottom and the smallest, most delicate ones near the top, and insert parchment paper between each layer. Store in a cool, dry area. I try to make mine no more than one week in advance, and advise people to eat them as soon as possible! They should be eaten within one month for sure. Some people claim they are fine even up to 3 months, however, I’m a firm believer in “the sooner, the better!”
I hope this tutorial has helped you! I welcome any questions or feedback… Have I forgotten to mention something? Do you need clarification on anything? Please ask or let me know!
If you like learning with video, you can also find me on YouTube, by clicking here.
Have fun creating!!
xo,
Marian
For some other butterfly cookie examples see this older post here.
Hi again Marian!
There’s yet another baby shower, and I’m going to make roughly 30 cookies as party favours.
Question for you is… should I halve the recipe for 30 cookies or should I make one complete one?
I guess what I should be asking is: how nay cookis
Hi again Marian!
There’s yet another baby shower, and I’m going to make roughly 30 cookies as party favours.
Question for you is… should I halve the recipe for 30 cookies or should I make one complete one?
I guess what I should be asking is: how many cookies can i decorate with one recupe?
Thank you
As always, still in love with your blog <3
Thank you for this helpful information! I used this and another one of your posts to decorate cowboy cut-out cookies for my son’s birthday party. It was my first attempt at royal icing and the cookies turned out super cute!
Thank you so much. I am having my daughters #2 birthday party and want to make cookies. This website is fantastic. I have learned a lot on flooding and piping cookies. I will attempt them on Thursday. Again, thank you for your knowledge and sharing it with others.
Hi Marian..
if we can’t find Meringue Powder, is there any substitute for that ingredient?
thank you
Paulina
Wilton makes one, you can find it at Michaels or anywhere Wilton products are sold.
wow…butterfly cookie idea is really great.
[...] [...]
[...] sugar cookies decorated with royal icing won’t be eaten now, but if you decide to make them for an event, [...]
[...] you’re into making your own icing, then check out Sweetopia’s recipe for royal icing here. If you need something quick and simple, then you can use Betty Crocker’s Cookie icing, which [...]
[...] can find my favorite royal icing recipe here. The consistency of icing is key for easy decorating. Click here to see a YouTube video on [...]
[...] accurate, but I had a lot of fun playing around with the icing to see what it could do. I used the recipe and technique tips shared on Sweetopia. I also forgot the first rule of thumb when using icing colors…pinks and reds taste horrible [...]
[...] before and I’ll probably keep using this one. The royal icing (flood icing) recipe I got from Sweetopia.net. The bottom of that link has the recipe and that page has the tutorial on how to get the icing to [...]
[...] previous experience with royal icing, but I wasn’t going to let that stop me. Having read this post on decorating with royal icing, I embarked on my plan to make a Duncan [...]
[...] later. Beat it all together and use the “10 second rule” to be sure. (Totally follow THIS tutorial. It’s amazing – and the butterfly cookie? [...]
[...] can find my favorite royal icing recipe here. The consistency of icing is key for easy decorating. Click here to see a YouTube video on [...]
[...] Royal Icing recipe (Adapted from Sweetopia) [...]
[...] favoriete royal icing recept vind je hier. De consistentie van de icing is heel belangrijk voor het decoreren. Klik hier voor een you tube [...]
[...] para no pasarme con el agua utilizo un cuentagotas. Pero esa el la teoría para quien le interese. Sweetopia tiene unos tutoriales muy interesantes con respecto a la decoración de galletas. Sus reglas de [...]
[...] favoriete royal icing recept vind je hier. De consistentie van de icing is heel belangrijk voor het decoreren. Klik hier voor een you tube [...]
[...] can find my favorite royal icing recipe here. The consistency of icing is key for easy decorating. Click here to see a YouTube video on [...]
[...] used my gingerbread dough recipe and you can find my favorite royal icing recipe here. The consistency of icing is key for easy decorating. Click here to see a YouTube video on [...]
[...] Once cookies have cooled, use your icing to decorate. For a fantastic tutorial on making/tinting/decorating with royal icing see Sweetopia’s Cookie Decorating Tutorial. [...]
[...] recipe from Sweetopia [...]
[...] http://sweetopia.net/2009/06/cookie-decorating-tutorial-general-tips-butterfly-cookies/ [...]
[...] can find my favorite royal icing recipe here. The consistency of icing is key for easy decorating. Click here to see a YouTube video on [...]
[...] Butterfly Cookie Tutorial [...]
[...] can find my favorite royal icing recipe here. The consistency of icing is key for easy decorating. Click here to see a YouTube video on [...]
[...] Icing Recipe here. *White is the best colour to tint your icing. Any other colour as the base tends to cloud the [...]
[...] also spent Saturday afternoon decorating Christmas cookies. I used this recipe for the cookies, and this recipe for the icing. We had a lot of fun and each put our own “spin” on the cookies we [...]
[...] it comes to royal icing, my go to recipe is from Sweetopia. Not only does she provide the most amazing royal icing recipe from Antonia74{cakecentral.com}, but [...]
[...] All in all, certainly not perfection but I feel like this was a great first attempt and I definitely want to try working with royal icing some more in the future. The possibilities for cute cookies are absolutely endless and I think I might be hooked. If you want an incredible tutorial and a wealth of information check out this post from Sweetopia. [...]
[...] I saw them). They taste awesome, aren’t more expensive then buying all the ingredients to make your own, give you a lot, and speed up the process nicely. Filling in sugar cookies is therapeutic! Have [...]
[...] cooled, make a batch of royal icing. Fill a pastry bag fitted with a fine tip and outline the [...]
[...] cooled, make a batch of royal icing. Fill a pastry bag fitted with a fine tip and outline the [...]
[...] to throw. I hope you enjoy… The Brunch Menu: Bunny Cookies (These sugar cookies and this icing.) Donut Tree (A foam cone, wrapped in tissue. Donuts on the tree with toothpicks.) Bacon-Wrapped [...]
[...] royal icing recipe I use is from Sweetopia. There are some great tips on her post, so make sure you check it [...]
[...] Royal Icing Recipe This entry was posted in Cookies, Star Wars and tagged Darth Vador, Kopykake, May the Fourth be With You, royal icing, Star Wars cookies, Storm trooper, Yoda. [...]
[...] My favourite royal icing recipe is from Sweetopia. Not only does she share her favourite icing recipe, she provides great tips and helpful [...]
[...] My favourite royal icing recipe is from Sweetopia. Not only does she share her favourite icing recipe, she provides great tips and helpful [...]
[...] Icing Recipe here. *White is the best colour to tint your icing. Any other colour as the base tends to cloud the [...]
[...] can find my favorite royal icing recipe here. The consistency of icing is key for easy decorating. Click here to see a YouTube video on [...]
[...] can find my favorite royal icing recipe here. The consistency of icing is key for easy decorating. Click here to see a YouTube video on [...]
[...] A Candy-Corn Cookie Cutter A Tulip Cookie Cutter (you heard me right!) Black Gel for Ghost Face Red and Yellow food coloring (for the candy-corn’s yellow and orange stripes) A Sugar Cookie Recipe and its ingredients (Here is one I recommend if you do not have your own) A Royal Icing Recipe and its ingredients (Here is one I recommend if you do not have your own) [...]
[...] Royal Icing (for a recipe click here) [...]
Name (required)
Email (required)
Website
XHTML: The following tags may be used:
689 Comments Posted 13/06/09


627 Comments Posted 08/01/12


401 Comments Posted 20/09/09


347 Comments Posted 23/01/12


331 Comments Posted 28/02/11


235 Comments Posted 08/06/10


94 Comments | Posted May 2nd 2011


Good royal icing recipes are hard to come by, let alone magical ones. Treat your treats to this sublime icing recipe, passed down through generations of mythical fairie… Read more


Privacy | Hosting by Media Temple | © Copyright 2009-2014, Sweetopia. All Rights Reserved.
Review this recipe