
French Rolls-to-Die-For
By Addie
"Easy to make French bread rolls. Dough can be made in mixer, bread maker, or by hand. Loaves or rolls can be brushed before baking with a glaze of 1 beaten egg white mixed with 1 tablespoon water if desired."
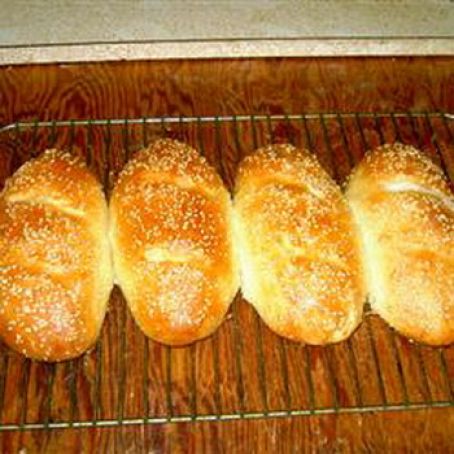
MY NOTES: Make these shaped like the photo above for sandwich rolls!
 1 Picture
Ingredients
- 1 1/2 cups warm water -- (110º)
- 1 tablespoon active dry yeast
- 2 tablespoons sugar
- 2 tablespoons vegetable oil
- 1 teaspoon salt
- 4 cups bread flour
Details
Preparation
Step 1
To make the dough in the bread machine, put water, oil, sugar and salt in first, then flour, then yeast in he pan. Use DOUGH cycle. When dough cycle is finished, remove the dough.
Deflate the dough and turn it out onto a lightly floured surface. Divide the dough into 16 equal pieces for dinner rolls and form into rounds. Place the rounds on lightly greased baking sheets at least 2 inches apart. Cover the rolls with a damp cloth & let rise until doubled in volume, about 40 minutes. After fully risen, carefully cut a slit in the tops of the rolls, if desired.
Bake in preheated oven for 18 to 20 minutes, until golden brown. Spritz oven with water for a crisper crust if you like.
For sandwich rolls, make 8 larger size rolls.
Recipe can be halved to make just 8 dinner rolls.
...............
REVIEWS: (780)
I've MADE these and they ARE 'to die for!!!' I had neighbors come over one day while they were cooling on the counter...and her Mom ate about 4 of them! They're especially good with Roast Salad or Ham Salad in them...Yumm!!!
Yummm..These just came out of the oven piping hot. I split one, and spread it with melted butter: I'm on cloud nine! They have a light, yet substantial texture. The flavor is delicate, with a hint of sweetness in the backround. The crust is crisp, but those who like theirs thick will have to follow some of the modifications for chewy, crusty crust in the other reviews. I used all-purpose flour, since I don't have bread flour on hand, and after reading reviews saying these rolls were bland, I added 1 1/2 tsp of honey to the sugar and yeast when proofing it. I found that I didn't need to add as much flour as was called for in the recipe, but that could be because I used all-purpose. I used 3 cups, and then as much as was needed to keep from sticking when I kneaded it. I let it rise on the top of the preheating stove, away from the heat of the vents, and it worked well. After I deflated it, I kneaded it in the bowl for a few minutes, then divided it into 8 rolls and covered them with the same oiled plastic wrap I used to cover the dough for the first rise. I had preheated the stove to 375 degrees, instead of the suggested 400, because it gave me more control on the darkness of the bread. I brushed them with melted butter, and they baked for 18 minutes until they were a lovely golden brown. I will definitely make this again, and will pass on the recipe.
To freshen up these rolls the next day, put the rolls in a paper bag, sprinkle the bag with cold water, and put in a preheated oven at 350F for 5 minutes. They'll taste as good as the first day. These rolls freeze well too. Defrost in the plastic bag and let the ice crystals get absorbed back into the rolls, then freshen as stated above.
I followed the recipe exactly, except I used my bread machine to do all the work. They turned out excellent & will be made often at our house!
This was my second attempt at making homemade bread, and it turned out very well. I used my Kitchen Aid stand mixer to do all the mixing and kneading, so all I had to do was roll it out. I made half the recipe into a regular-sized french bread roll and the other half into the rounds. Next time I'll separate it into four pieces and try to make smaller baguettes, because after it had risen, it was bigger than I wanted. Warning: this is a very sticky dough to work with, but apparently french bread usually is, so don't be alarmed like I was!
I tried this recipe, and now my family is hooked. These rolls work well in every situation. My family and I recently went on a beachside picnic and the children begged for these rolls to make sandwiches with. They are easy, delicious, and turn out perfect every time. My 14 y/o son now makes them as well!! Thanks for the fab recipe. I just wanted to add a helpful tip to those who prefer a crustier chewier roll, spray with cold water with a fine mist spray bottle a couple of times during baking time. Great recipe!!
These were really good! I shaped them into oval buns (like the bakery) and they were perfect for sandwiches. The only thing I changed about this recipe was the size of the rolls. Instead of making 16 which would have been too small for sandwich buns I made 8.
These are the best rolls. The crust is kind of chewy, and the inside is very soft and light, just the way I like it. Last time I made them, I made rolls with half of the dough, and froze the rest, then later used it for pizza crust. It was the best pizza crust that I have ever made.
Excellent recipe, perfect with easy Slow Cooker French Dip. I made them slightly oval shaped -just prior to putting them in the oven I made a small slit in the tops, French-bread style, and gave them an egg-white/water wash. Gives the bun a nice shiny finish. 6 people ate all 16 buns in one sitting!
Great recipe! These rolls are delicious and would go with so many foods - I think I'll make sandwiches with the leftovers tomorrow. I did wind up only cooking them for about 12 minutes, so definitely check them before the full cooking time.
I love it!.. This was so easy and the texture is so great for sandwich rolls, just make them bigger for hamburgers or hoagies. Thanks to all my AR Bread Baking Foodie Friends it was a success. I will save this recipe and make again. I am not sure if I will ever buy hamburger buns again. UPDATE...add some garlic powder and shredded cheddar cheese, then brush with butter and sprinkle on garlic powder... very good....:) I also like baking them at 375 rather than 400. UPDATE.... READ THE PART where it says, to add 1/2 cup at a time until pulls away... that means it wont take all 4 cups.. ALSO.. I used one envelope of yeast and it worked fine also.
Though my sweet husband announced these were "homemade" rolls, one of our guests still insisted she discover which bakery we visited! They looked and tasted that professional. I used egg white/water wash, sprinkled some rolls with poppy seeds or sesame seeds, and misted the oven with water several times during the first five minutes of baking. To the recipe I also added 2 tsp. of vital wheat gluten to increase the rise and chewiness. I also like this better with increasing the salt to 1 1/2 teaspoons. TIP: Do NOT FEAR THE BROWNING !! It is ESSENTIAL!!! BE SURE TO BROWN VERY WELL! I thought I overbrowned/burned a batch, but even that batch was still perfect--hard outside and soft inside. If you underbrown you will have the boring rolls from other reviews. Later note: I have made these several times. I plan to leave out the sugar from now on, as it spoils the authentic taste. ALSO, for a perfect chewy crust, I have been removing from oven, letting cool several minutes, then rebaking until very brown and HARD as rocks. Really! You may be shocked that the inside is still moist, while it has the professional chewy crust. Lastly, I have found this needs a firm, not soft dough, so add extra flour if necessary.
Review this recipe