
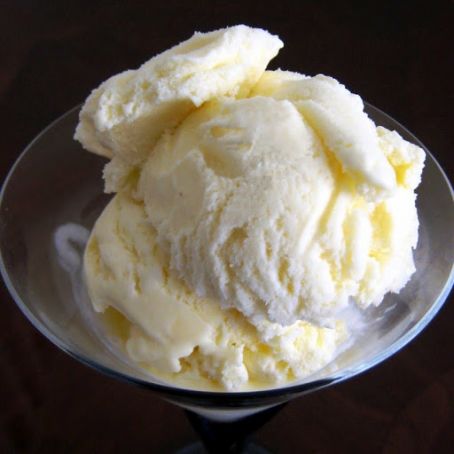
REAL Vanilla Ice Cream
By RoketJSquerl
 1 Picture
Ingredients
- 1 Quart Cream
- 3/4 Cup Sugar
- 1 Tablespoon Vanilla Extract
- 1 Pinch Salt
Details
Servings 4
Preparation
Step 1
You can use any combination of cream that you like. You can use whipping cream or half-n-half or whole milk. I like 2 cups whipping cream and 2 cups half-n-half. But you could use 1 cup whipping cream and 3 cups half-n-half or 3 cups whipping cream and 1 cup half-n-half (you get the picture). Just make sure you end up with one quart. NOTES ON USING MILK: Be aware that whole milk may not be thick enough to slow and then stop your ice cream maker - indicating that the ice cream is ready. Keep an eye and ear out and if your machine slows down at all, your ice cream may be done. There is a little flexibility with the amount of sugar. I wouldn't go lower than 2/3 cup or higher than 1 cup. This is your vanilla ice cream base. If you want to jazz it up, scroll down a little. Instructions for making the ice cream You can make it right now or better yet, make it tomorrow If you just can't wait any longer, go ahead and make your ice cream now. Mix everything together and follow the directions on your ice cream maker. BUT if you want your flavors to blast into orbit, I highly recommend waiting 'til tomorrow. You'll have one more step involved (scalding) and a little more waiting, but the flavor reward will be well worth it. Here's how you do it: Mix cream, sugar and salt (not the vanilla) together in large sauce pan. Cook on medium heat. Heat the mixture, but DO NOT boil. The best way to stay safe (and not boil or burn your cream) is to just stay with it and keep stirring. When you see small bubbles forming around the edge of the pan, the mixture is almost warm enough. Keep stirring until you see a little steam starting to rise from the cream mixture. Immediately take it off the burner. Cool the mixture The cream mixture needs to cool before you add the vanilla. You could just leave the pan out to cool off, but this takes too long and I don't like the idea of leaving a milk product out on the counter for an extended amount of time. Here's what I do: get another bowl a little larger than your saucepan and add ice water to it. Gently place your saucepan into the larger pan being careful not to splash water into your ice cream mixture. Gently stirring the mixture will cool it quickly. Stir in vanilla Chill mixture Pour mixture into a container with a tight lid and chill overnight in the fridge Make the ice cream Now that you've done all the work (and have waited patiently), follow the instructions on your ice cream maker and kick back. Ripen ice cream....or not Most ice cream makers recommend to "ripen" the ice cream right away. This will make the ice cream harder. However, ripening is optional at this point. Most people (including myself) prefer the ice cream immediately after it is made. You WILL have to put it in the freezer soon, but you've already waited long enough. Store what's left (if there is any) Homemade ice cream is very dense. After all, you've used the purest ingredients available with no fillers. And the ice cream hasn't been whipped to a fluff with air to create more volume. Very dense=very hard. Soften by placing in the fridge for 10 minutes before serving your next round. How to make it Strawberry or Peach This is ohhhhhh so easy Add 2 cups of fruit puree stirred with one teaspoon lemon juice to the ice cream base. If you're making the ice cream right away, just add the fruit puree right in with all the other ingredients. If you're scalding the cream mixture and chilling the mix overnight do it this way: add the fruit puree when you add the vanilla (after the mixture has cooled). You'll want to read these helpful notes For strawberry: You'll need about 1.5 pounds of strawberries (pre-cleaned weight from the grocery or farm). Wash, remove stems and chop them up a little. Now get your food processor out and give them a whirl. The amount of processing depends on how big you like the pieces of strawberry in your ice cream. I don't like huge hunks in mine so I give it several whirls. Add one teaspoon lemon juice and stir. Peach: You'll need about 2 pounds of peaches (pre-cleaned weight from the grocery or farm). Wash, peel, remove peach stone and chop it up a little. Depending on what kind of peaches you have, you may need to remove some of the red, hard fruit from the center of the peach too. Using your processor, give them a whirl. The amount of processing depends on how big you like the peach pieces in your ice cream. Don't use huge peach chunks in your ice cream - they will be hard as rocks and hard to eat. Add one teaspoon lemon juice and stir. Candy Bar Version Give this a try Another fun idea is to chop up a candy bar (or two) into your ice cream. I recommend Snickers or Milky Way. If you're making the ice cream right away, just add the candy bar chunks in with all the other ingredients. If you're scalding the cream mixture and chilling the mix overnight do it this way: go ahead and chill the mix overnight and add the candy bar chunks just before adding the base to your ice cream maker. Why do I keep calling it "Real" Ice Cream? By definition, Ice Cream is a mixture of cream, sugar and flavoring. When you use eggs, you're actually making a frozen custard. Custard is defined as a sweetened mixture of milk and eggs. However, it has become widely accepted to use the term "Ice Cream" when using eggs. I'm not knocking custard. In fact, most recipes for ice cream do call for eggs. However, what my heart longs for is that creamy goodness that comes from the 3-ingredient base. Storing Ice Cream Now there's a solution Storing left over ice cream has been a challenge to folks who make homemade ice cream since the beginning of time. Until now the best we could do was put the remainder of the ice cream in a plastic container with a lid and store in the freezer. The results were not good. I've broken plastic containers everytime I've done this. And the ice cream suffers too. Thankfully you can now buy a product made especially for the home user. Available from Amazon. See the link below.
Review this recipe