Traditional Cantonese Mooncakes
By garciamoss
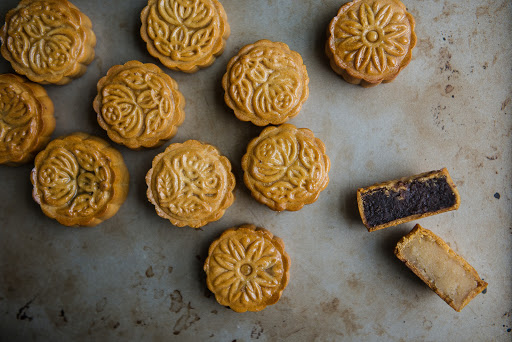
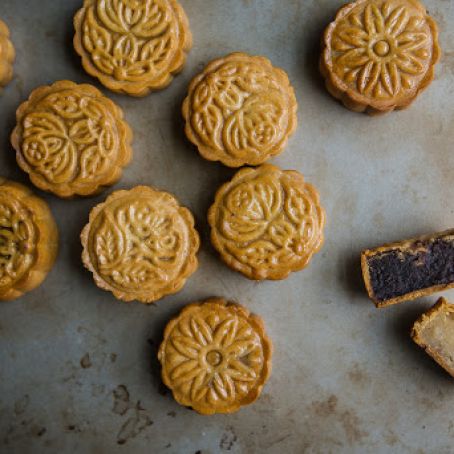
These days there are a million versions of the mooncake, from ice-cream snowskin mooncakes by Godiva to espresso-flavored cakes in the displays at Starbucks. For me, the best is still the most traditional -- fragrant, smooth white lotus paste with duck yolk. This recipe doesn't tackle the egg yolk, but will make a standard (mini) Cantonese-style mooncake with either a red bean or white lotus paste filling.
 1 Picture
Ingredients
- For the filling:
- 1 cup dried lotus seeds or red beans
- 2/3 to 3/4 cup sugar (to taste)
- pinch of salt (optional)
- 6 tbsp coconut oil, or other solid fat of your choice (i.e. lard or shortening)
- For the skin:
- 1/4 cup golden syrup (i.e. Lyle’s)
- 1/2 tsp alkaline water (also known as kansui, or potassium carbonate and sodium bicarbonate solution, like this)
- 2 tbsp vegetable oil
- 1/2 cup all-purpose flour
- 1/2 cup cake flour (alternatively, omit cake flour and use 1 cup all-purpose)
- for baking:
- 1 egg
- a splash of milk or water
Details
Adapted from tworedbowls.com
Preparation
Step 1
Soak the lotus seeds or red beans overnight in plenty of water. If using lotus seeds, split the seeds open and remove the green germ from the center.
Drain and place in a medium pot with enough water to submerge the beans or seeds by at least an inch. Simmer on medium-low heat for 1 1/2 to 2 hours, adding water as necessary to keep the beans or seeds covered, until the bean mashes easily between your fingers or the seed is fork-tender.
Drain and place in a food processor or blender with the sugar and a slight pinch of salt, if desired. If you don't have a processor or blender, you can make the red bean paste simply by mashing with a spoon or potato masher, but I wouldn't recommend making lotus paste without one. Blend until smooth and about the consistency of hummus.
Return the paste to a saucepan and combine with the coconut oil over medium heat. Cook, stirring continuously with a wooden spoon or heatproof spatula, until the paste thickens considerably and turns glossy. When it resembles very soft cookie dough and sticks to your spoon in one mass, you're done. Chill the filling in the refrigerator while you make the mooncake skin -- ideally, the filling should be firm and cold by the time you assemble the cakes.
To make the skins, sift together the two flours. In a separate, large bowl, whisk together the syrup, alkaline water, and vegetable oil until blended. The mixture will likely not fully combine, but do the best you can to emulsify it. Next, add in the two flours and use a wooden spoon to stir until it forms a pebbly dough. Gather the mixture together and gently knead just until it comes together into one mass -- take care not to knead vigorously. Cover with plastic wrap and let rest for 45 minutes to an hour.
Preheat your oven to 350 degrees. Divide the filling into 12 equal pieces and shape each of them into a ball. Each filling ball should be about 2 tbsp to 2 1/2 tbsp. If you have a kitchen scale, each ball should be about 33-34 grams in weight. (*Note*: These dimensions are designed to make miniature mooncakes -- see Notes below.)
For each mooncake, scoop about a tablespoon of dough and roll it out between two pieces of parchment, to about 3 to 3 1/2 inches in diameter. You may want to flour your hands lightly for this next step, though I didn’t and it was generally fine. Place a ball of filling in the center and fold up the dough around the ball. It likely will not cover the whole ball at once, nor should it. Gently push, press and squeeze the dough, holding the ball securely in your palm, until the dough gradually covers the ball. The firmer your filling, the easier this will be. If it really won’t squeeze over the filling, don’t worry -- just pinch off another small piece of dough, roll it out, and use it to patch the ball. I did this a few times and the results were just as good.
Place the mooncake ball into your mold and turn it upright on your surface. Press the plunger down until you feel resistance. Lift the mooncake mold off the table and use the plunger again to push the mooncake out. Place on a Silpat- or parchment-lined baking sheet while you make the rest. If it’s a hot day, you may want to place these in the fridge to keep their form while you finish folding.
When you’re done forming the mooncakes, bake them at 350 degrees for 8 minutes. Meanwhile, whisk an egg with a splash of water until smooth. Remove the mooncakes from the oven and let cool for about 10 minutes. Brush on the egg wash, then bake for another 10-15 minutes, or until golden brown on top and fragrant.
Let cool completely. Store the mooncakes in an airtight container for two days to “release oil” -- the mooncake skins will become shiny, soft and supple, and it’s at this point that they’re meant to be enjoyed. (But I won’t tell if you sneak one fresh.) Gift them to friends, or enjoy!
Notes:
The recipe here is designed for miniature mooncakes, which are about 50-60 grams in size (or about 1/4 cup). For traditional-sized mooncakes, you may need to play around with the sizes of the fillings and the skins to get the right shape. I would roughly estimate this makes about 6 large mooncakes, with about 1/4 to 1/3 cup filling each and about 3 tbsp of skin -- but use your best judgment.
Review this recipe