Drying Herbs
By cwyorkiex3
Do you have an abundance of beautiful herbs still growing in the garden and would love to continue enjoying them through out winter? Drying them is a great solution. It is great to have dried herbs hanging close at hand that you can quickly trim and use in your cooking during those cold and chilly months, and a huge bonus is walking into a room to smell the lovely aromatics they give off as they dry. There is nothing like smelling Rosemary or Lavender when you walk into a room. You can also make small bundles to tie onto presents during the holiday season, or imagine keeping a basket of bundled Rosemary by the fireplace that you could toss into the fire and enjoy its lovely aroma as it fill your room.
If you don’t have herbs maybe a friend does and would love someone to come over and do a trim up for them? You can also purchase herbs at the farmers market or grocery store. (I recommend organic, pesticide free if possible)
 1 Picture
Ingredients
- Herbs of your choice
Details
Preparation
Step 1
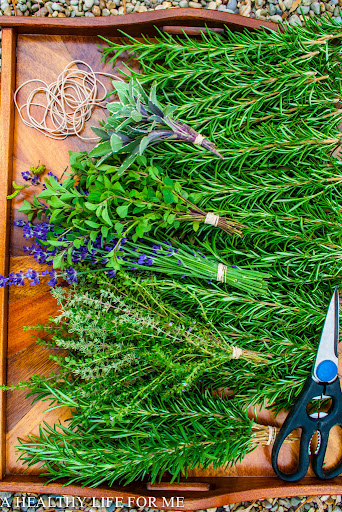
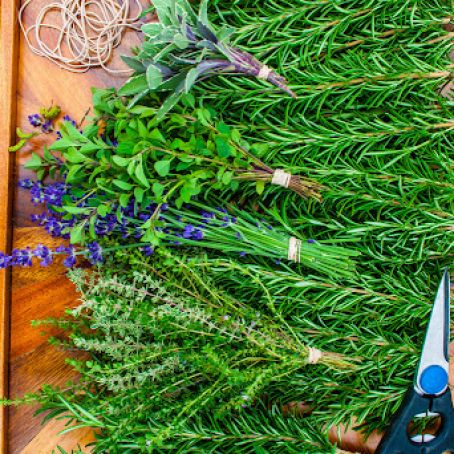
I cut Rosemary, Oregano, Thyme, Sage and Lavender. Herbs such as lovage, parsley and basil don’t dry well, and you will be disappointed with the end result. When you head out to start harvesting take a tray or something to carry your cut herbs, scissors and rubber bands. I prefer to tie my herbs as I cut. That way all the removed leaves and cuttings are left in the garden, but this is strictly a personal decision. Plus, I like to give any bugs a chance to evacuate before I head into the house.
When you go to cut try to cut in the morning and most importantly when herbs are dry (no dew or rainwater). Also before you start cutting think about how you will be using the herbs. Will you strictly be drying them to use in recipes, making a Herb Swag (which I will be posting how to do) or using as gifts, cut the length based on how you will use them? Whatever your reason try to cut to a similar length. Again think about what you will be using them for when you go to bind them. More stems for a swag, less for a gift, but try to stick from no less than 4. Hole your herbs together and twist the rubber band around the end securing tightly.
How many you use will also depend on how thick the herb’s stem Thyme and Oregano have thinner stems, so put more per bundle than Rosemary and Lavender, which can have less. Also, remove all leaves on the bottom where you will be wrapping them. I secured my bundles using rubber bands because they are inexpensive and as the herbs dry they will shrink and the rubber band will keep tight. If you use string or twist ties, the herbs may fall out of the tie once they shrink.
Once you have all your bundles tied you need to store them. To keep them from collecting dust a lot of people say you have to cover them as the hang. You can use a paper bag, paper towels, what ever you have on hand will work as long as it keeps the herbs dry and dust free. If you’re using a paper bag, punch hole in bottom and use butcher twine to tie to rubber band around herbs and then thread string through hole in paper bag. Attach string to whatever you plan to hang them. I don’t do this, it takes too much time and really where would I hang all those bags? I like to show them off as they dry. I hang them from the handles from my cabinets that showcase my china, I make them into swags which allows me to hang a lot of herbs in one area. My one rule is to make sure that the room I hang them in is dry and that no direct sunlight will be hitting them. Direct light destroys the herbs essential oils.
Your herbs should be completely dry in about two weeks. They are now ready to use.
Review this recipe