
No Bake Cheesecake
By MaryEllen
When I was growing up, Sunday dinner dessert was most always my mom’s no-bake cheesecake. It was a simple dessert with no fuss and all of us kids loved it. Her favorite fruit topping was cherry though, which I absolutely hate, but whenever she made it, I would scrape the cherries off and eat the rest. No complaints! I decided to try my own hand at them, and I tried to follow my mom’s recipe, but with a few exceptions. After all, my tastes have changed over the years, and as one who spends so much quality time with me, myself, and my kitchen, I added a few twists.
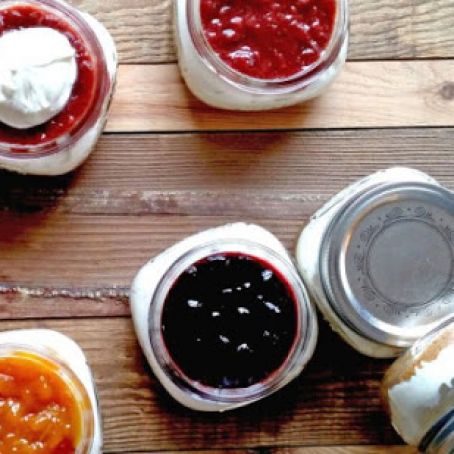
As you can see, I decided to make these in individual mason jars. I did this basically because I think it’s prettier (and it’s all about the pretty for me!), and it’s individually portioned. You can grab one and go, and you won’t need a plate, or a knife to cut it with… all you need is the jar and a fork. If you prefer, you can certainly make this up in a 9″ x 13″ Pyrex dish and cut it into squares to serve.
 1 Picture
Ingredients
- Ingredients for Cream Cheese Filling:
- 1 1 1 package graham crumbs
- Butter (as per graham crumb package instructions)
- 1 1 1 teaspoon cinnamon
- 2 2 2 packages cream cheese, softened at room temperature
- 2 2 2 teaspoons vanilla extract
- 2 2 2 cups heavy whipping cream
- 1 1 1 cup confectioner’s sugar
- Ingredients for Topping:
Details
Servings 1
Adapted from prettypracticalpantry.com
Preparation
Step 1
The process couldn’t be easier! Start by mixing the melted butter into the graham crumbs and cinnamon. (Cinnamon in the graham crumb crust is the first secret. It adds such a wonderful, homemade taste to the crust.) I used my hand mixer so that I could be sure the butter was completely incorporated. When you purchase the graham crumbs, the amount of butter and graham crumb ratio will be printed on the package; follow those instructions for proper amounts. Portion three tablespoons into each 125 ml mason jar, if that’s the vessel you choose to use, otherwise, dump the whole amount into your Pyrex dish. Using the back of a teaspoon, gently move the graham crumb mixture into place. Don’t press the mixture down too hard; this will result in a crust that’s too firm. You will want a crumbly crust. Place the jars, without the lids, (or your Pyrex dish) in the refrigerator while you start the cream cheese filling.
To make the cream cheese filling, using your KitchenAid stand mixer with the whisk attachment, beat the heavy cream and vanilla until firm peaks form. Next, in a separate bowl, whip the cream cheese until smooth and free of lumps. Turn off the mixer, add the confectioner’s sugar to the cream cheese and whip again until the sugar is fully incorporated. Add the whipped cream to the bowl of cream cheese and whip until fully combined. (That’s the second secret. Use heavy whipping cream. Don’t use the store-bought cool whip or packaged dessert toppings. Also, the confectioner’s sugar is a little flavour boost. You can add as much or as little as you want to suit your tastes.)
Remove the jars (or your Pyrex dish) from the fridge and top the crust with the cream cheese mixture. I used a large ice-cream scoop for this task. Center the filled ice-cream scoop over the opening of the jar, release and gently tap the bottom of the jar onto a wooden cutting board to spread out the cream cheese mixture. (In your Pyrex, spoon large amounts of the cream cheese mixture on the crumb surface and carefully spread the mixture evenly over the crumbs. Be careful not to pull up the crumb mixture when spreading the cream cheese. An off-set spatula would work better than a spoon.) Place the jars (or dish) back into your refrigerator for at least one hour. Do not place the lid on the jars!
When an hour has passed, top the cheesecakes with your favorite homemade jam. (That’s the third secret. Use homemade jam. By doing so, you can once again control the sweetness and keep this dessert your own. You can find my homemade jam recipe under the recipes menu.) Once you have topped with the jam, (again, using the cutting board and the tapping technique to spread the jam evenly) place the seals and lids on the jars and place them back into the refrigerator. If you can, and you should, wait at least two hours for the dessert to set. Then, grab a spoon and dig in!
Review this recipe